Sunday, November 29, 2020

SCALLOPED POTATOES

Scalloped Potatoes Recipe

SCALLOPED POTATOES

  •  prep time: 15 MINUTES
  •  
  •  cook time: 55 MINUTES
  •  total time: 80 MINUTES
  •  
  •  yield: 10 -12 SERVINGS 

DESCRIPTION

My favorite recipe for garlicky, cheesy, perfect scalloped potatoes.


INGREDIENTS

  • 3 tablespoons butter
  • 1 small white or yellow onion, peeled and thinly sliced
  • 4 large garlic cloves, minced
  • 1/4 cup all-purpose flour
  • 1 cup chicken stock or vegetable stock
  • 2 cups milk (I recommend 2% or whole milk)
  • 1 1/2 teaspoons Kosher salt
  • 1/2 teaspoon black pepper
  • 2 teaspoons fresh thyme leaves, divided
  • 4 pounds Yukon Gold Potatoes, sliced into 1/8-inch rounds
  • 2 cups freshly-grated sharp cheddar cheese*, divided (feel free to add more cheese if you’d like)
  • 1/2 cup freshly-grated Parmesan cheese, plus extra for serving

INSTRUCTIONS

  • Prep oven and baking dish: Heat oven to 400°F.  Grease a 9 x 13-inch baking dish with cooking spray, and set it aside.

  • Sauté the onion and garlicMelt butter in a large sauté pan over medium-high heat.  Add onion, and sauté for 4-5 minutes until soft and translucent.  Add garlic and sauté for an additional 1-2 minutes until fragrant.  Stir in the flour until it is evenly combined, and cook for 1 more minute.

  • Simmer the sauce. Gradually pour in the stock, and whisk until combined.  Add in the milk, salt, pepper, and 1 teaspoon thyme, and whisk until combined.  Continue cooking for an additional 1-2 minutes until the sauce just barely begins to simmer around the edges of the pan and thickens.  (Avoid letting it reach a boil.)  Then remove from heat and set aside.

  • Layer the potatoes.  Spread half of the sliced potatoes in an even layer on the bottom of the pan.  Top evenly with half of the cream sauce.  (I usually strain out all of the onions and add them here too.)  Then sprinkle evenly with 1 cup of the shredded cheddar cheese, and all of the Parmesan cheese.  Top evenly with the remaining sliced potatoes, the other half of the cream sauce, and the remaining 1 cup of cheddar cheese.

  • Bake: Cover the pan with aluminum foil and bake for 30 minutes.  The sauce should be nice and bubbly around the edges.  Then remove the foil and bake uncovered for 25-30 minutes, or until the potatoes are cooked through.

  • Cool. Transfer the pan to a cooling rack, and sprinkle with the remaining teaspoon of thyme and extra Parmesan.

  • Serve. Serve warm.

NOTES

Shredded cheese: As always when melting shredded cheese into a recipe, it’s best if you grate the cheese yourself just before adding it to the recipe.  Store-bought shredded cheese usually contains a coating that prevents it from melting smoothly.


MAKE-AHEAD INSTRUCTIONS:

Over the years, I’ve had lots of you ask if you can prep this recipe in advance — and the answer is yes!  For make-ahead scalloped potatoes, just bake the scalloped potatoes and let them cool completely to room temperature.  Then cover tightly and refrigerate for up to 3 days.  And on the day you are ready to serve them, bake the pan covered (with foil) at 350° for 30 minutes, or until the potatoes are warmed through.

POSSIBLE RECIPE VARIATIONS:

There are all sorts of delicious ways that you can customize these homemade scalloped potatoes if you would like.  For example, feel free to…

  • Add bacon or ham: Diced cooked bacon or ham would be a delicious addition here!  (Or go for the gold and make scalloped potatoes with ham and bacon!)
  • Add greens: Fresh kale or baby spinach would also be delicious.  Just stir a large handful to the sauce before layering the potatoes.
  • Add pesto: For an extra herby twist, feel free to stir 1/4 cup of basil pesto into the sauce.
  • Use half sweet potatoes: I also love making a version of this dish with half Yukon gold and half sweet potatoes.  The sweet/savory combo is such a winner.
  • Use a different cheese: Mozzarella, gouda, fontina or gruyere would also be delicious in place of the sharp cheddar.  Or you could also sprinkle some extra crumbled/diced brie, goat cheese, or feta into the casserole.
  • Make it gluten-free: Just use a gluten-free all-purpose flour blend (in place of the standard AP flour).  Or whisk 2 tablespoons of cornstarch into the cold milk before adding it to the sauce.

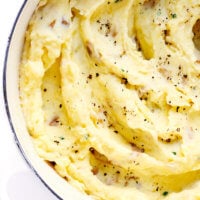
THE BEST MASHED POTATOES!

The BEST Mashed Potatoes Recipe

THE BEST MASHED POTATOES!


  •  prep time: 20 MINUTES
  •  
  •  cook time: 25 MINUTES
  •  total time: 45 MINUTES
  •  
  •  yield: 10 -12 SERVINGS 


INGREDIENTS

  • 5 pounds potatoes (I use half Yukon Gold, half Russet potatoes)
  • 2 large cloves garlic, minced
  • fine sea salt
  • 6 tablespoons butter
  • 1 cup whole milk
  • 4 ounces cream cheese, room temperature
  • toppings: chopped fresh chives or green onions, freshly-cracked black pepper

INSTRUCTIONS

  • Cut the potatoes.  Feel free to peel your potatoes or leave the skins on.  Then cut them into evenly-sized chunks, about an inch or so thick, and transfer them to a large stockpot full of cold water.
  • Boil the potatoes.  Once all of your potatoes are cut, be sure that there is enough cold water in the pan so that the water line sits about 1 inch above the potatoes.  Stir the garlic and 1 tablespoon sea salt into the water.  Then turn the heat to high and cook until the water comes to a boil.  Reduce heat to medium-high (or whatever temperature is needed to maintain the boil) and continue cooking for about 10-12 minutes, or until a knife inserted in the middle of a potato goes in easily with almost no resistance.  Carefully drain out all of the water.

  • Prepare your melted butter mixture.  Meanwhile, as the potatoes are boiling, heat the butter, milk and an additional 2 teaspoons of sea salt together either in a small saucepan or in the microwave until the butter is just melted.  (You want to avoid boiling the milk.)  Set aside until ready to use.

  • Pan-dry the potatoes.  After draining the water, immediately return the potatoes to the hot stockpot, place it back on the hot burner, and turn the heat down to low.  Using two oven mitts, carefully hold the handles on the stockpot and shake it gently on the burner for about 1 minute to help cook off some of the remaining steam within the potatoes.  Remove the stockpot entirely from the heat and set it on a flat, heatproof surface.

  • Mash the potatoes.  Using your preferred kind of potato masher (I recommend this one in general, or this one for extra-smooth), mash the potatoes to your desired consistency.

  • Stir everything together.  Then pour half of the melted butter mixture over the potatoes, and fold it in with a wooden spoon or spatula until potatoes have soaked up the liquid.  Repeat with the remaining butter, and then again with the cream cheese, folding in each addition in until just combined to avoid over-mixing.  (Feel free to add in more warm milk to reach your desired consistency, if needed.)

  • Taste and season.  One final time, taste the potatoes and season with extra salt if needed.

  • Serve warm.  Then serve warm, garnished with any extra toppings that you might like, and enjoy!


Thursday, November 12, 2020

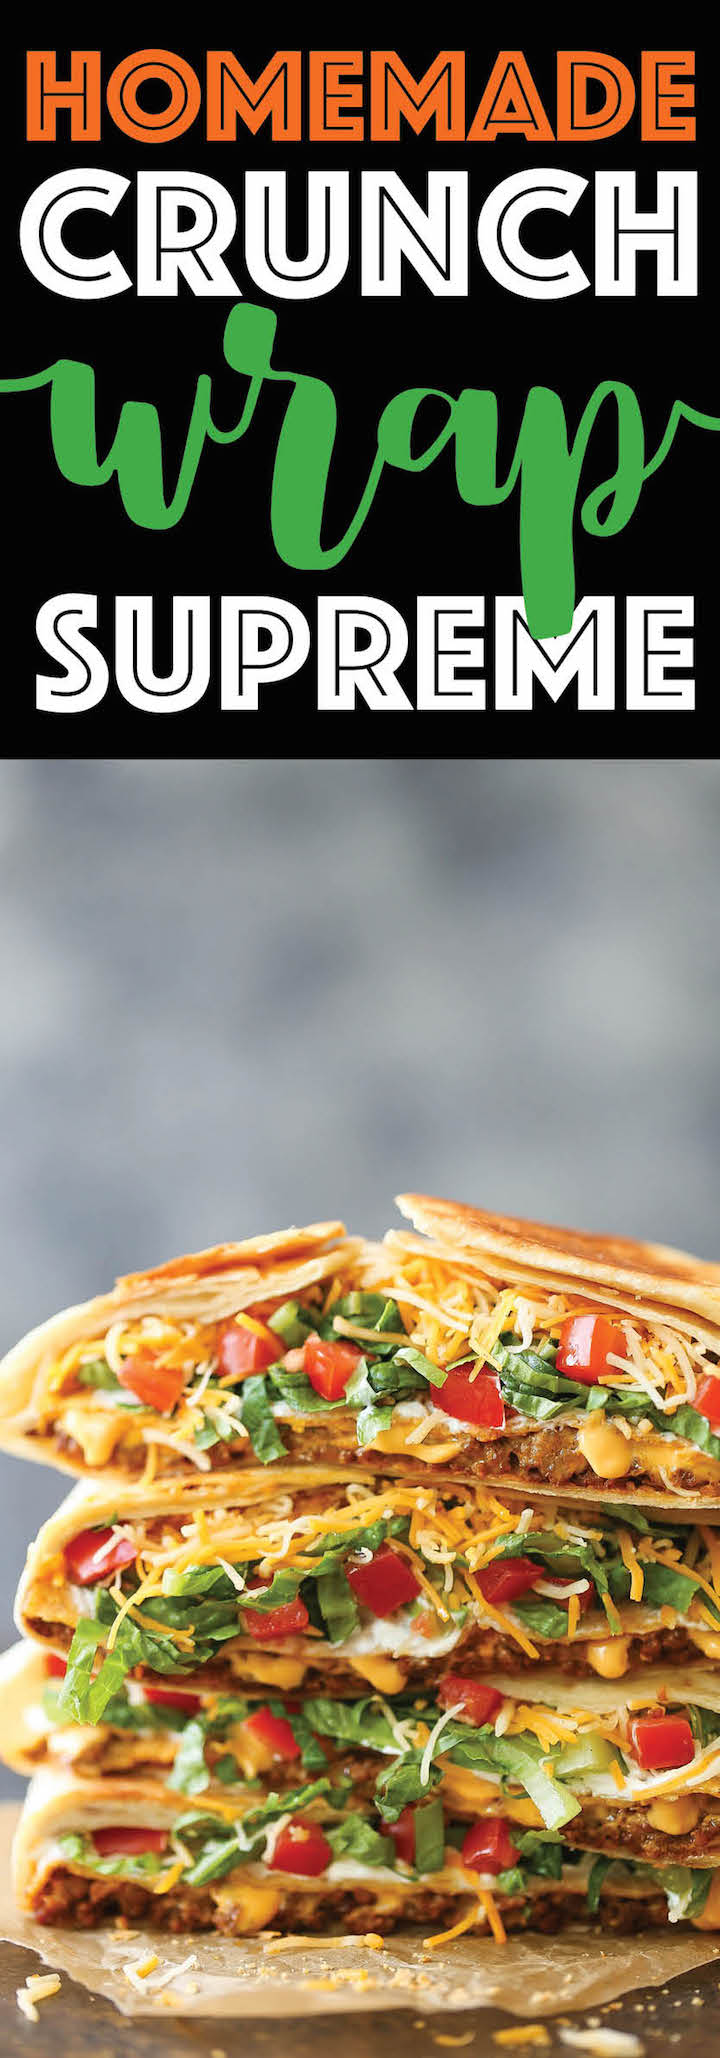
HOMEMADE CRUNCH WRAP SUPREME

 Homemade Crunch Wrap Supreme - A complete copycat version from Taco Bell! Except completely homemade and made so much more healthier! Get your fix now!


Beans, pulled pork, cheese, tostada, lettuce, tomato and sour cream, wrap it all up in a little gift package of a flu tortilla


HOMEMADE CRUNCH WRAP SUPREME

A complete copycat version from Taco Bell! Except completely homemade and made so much more healthier! Get your fix now!

INGREDIENTS:

  • 2 tablespoons olive oil, divided
  • 1 pound ground beef
  • 1 (1.25-ounce) package taco seasoning
  • 4 (12-inch) flour tortillas
  • 1/2 cup nacho cheese
  • 4 tostada shells
  • 1/2 cup sour cream
  • 2 cups shredded lettuce
  • 1 Roma tomato, diced
  • 1 cup shredded Mexican blend cheese

DIRECTIONS:

  1. Heat 1 tablespoon olive oil in a large skillet over medium high heat. Add ground beef and cook until beef has browned, about 3-5 minutes, making sure to crumble the beef as it cooks; stir in taco seasoning. Drain excess fat; set aside.
  2. Heat tortillas according to package instructions.
  3. Heat nacho cheese according to package instructions.
  4. Working one at a time, place ground beef mixture in the center of each tortilla. Top with nacho cheese and tostada shell. Spread sour cream in an even layer over the tostada shell; top with lettuce, tomato and cheese. Repeat with remaining tortillas.
  5. Fold the edges up and over the center. Continue to work your way around the tortilla, folding as tight as possible.
  6. Heat remaining 1 tablespoon olive oil in a large skillet. Place wrap seam-side down and cook until the underside is golden brown, about 2 minutes. Flip and cook wrap on the other side, about 1-2 minutes longer.
  7. Serve immediately.


Pop Tart Gingerbread House

SUPPLIES

You’ll need 6 pop tarts. I used strawberry because it already had red and green sprinkles on the frosting.

You’ll also need a variety of holiday candies and royal icing.

EASY ROYAL ICING FOR FROSTING GINGERBREAD HOUSES

  • 1/2 cup powdered sugar
  • 2-3 teaspoon water

Mix sugar and water together until it reaches the consistency of craft glue. You don’t want it to be too runny.

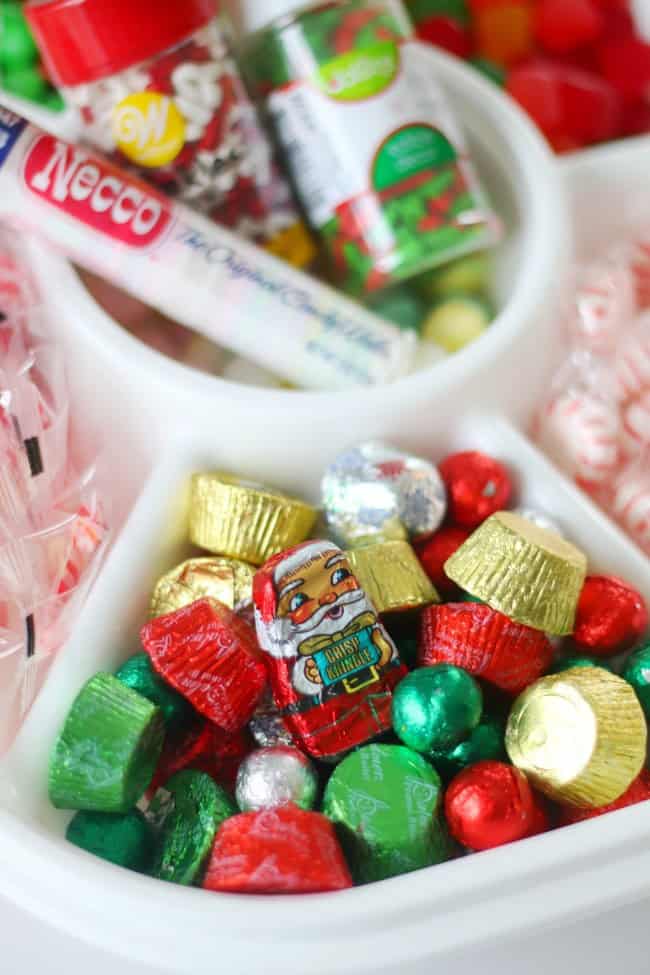
GINGERBREAD HOUSE CANDIES

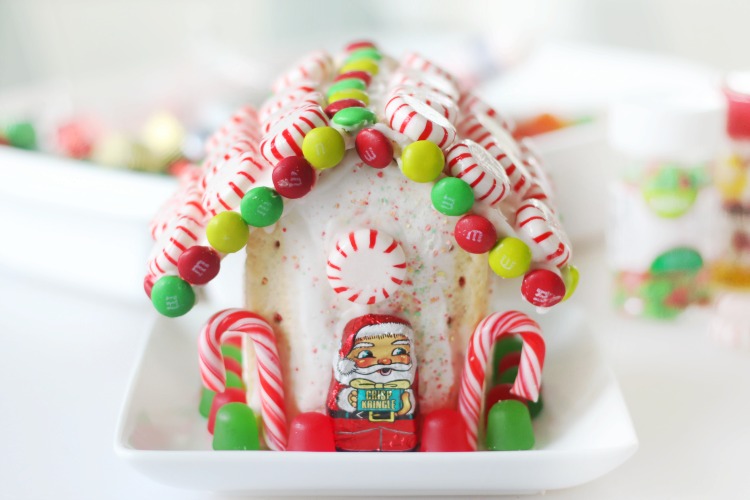
We all have our favorite holiday candies to use for gingerbread houses. My go-to candies are mints and chocolate candies in holiday shapes—like Santa, trees or snowmen.

chocolate santa candy

TIPS FOR ASSEMBLING POP TART GINGERBREAD HOUSE

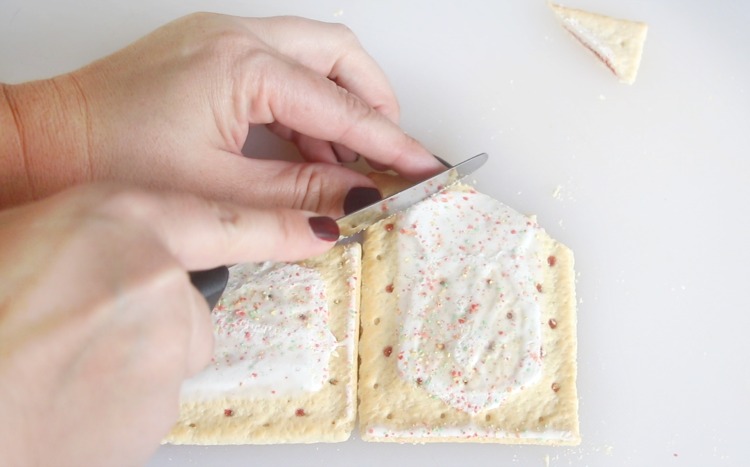
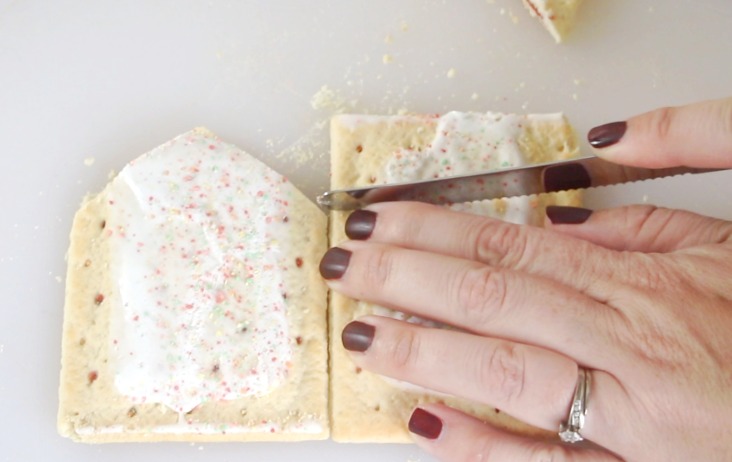
  • Follow my instructions at the end of the post for cutting your pop tarts. ONLY USE A SERRATED KNIFE to cut the pop tarts. A paring knife will not work. Gently saw as you cut and you’ll end up with nice clean lines.
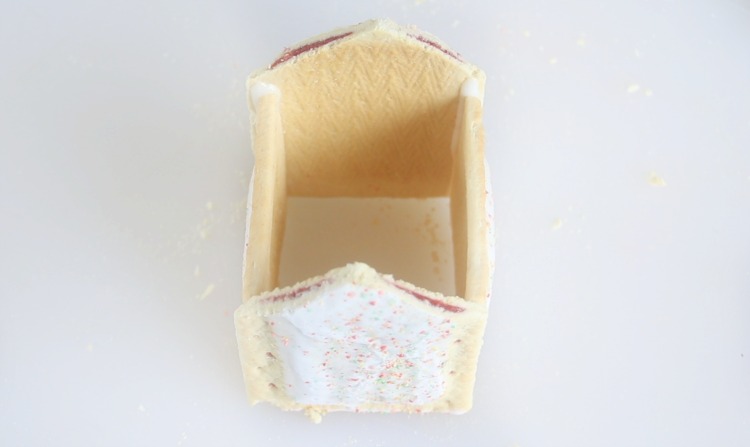
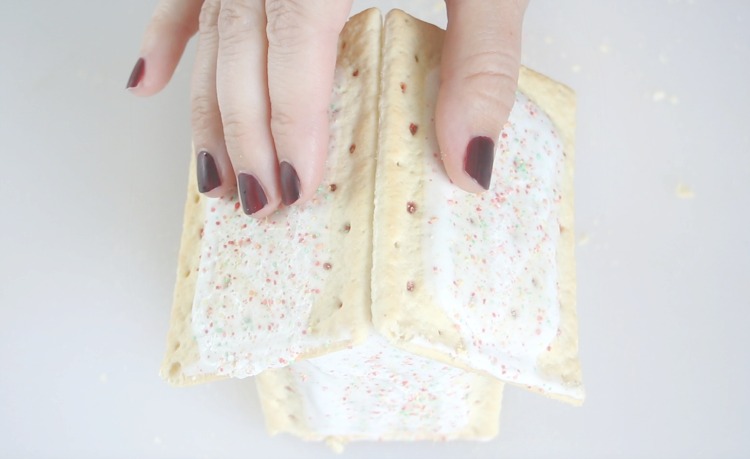
  • Add a bead of icing to the pop tarts and use your hands to hold the 4 walls into place for a minute or two. After that, the icing is tacky and will hold it on its own.
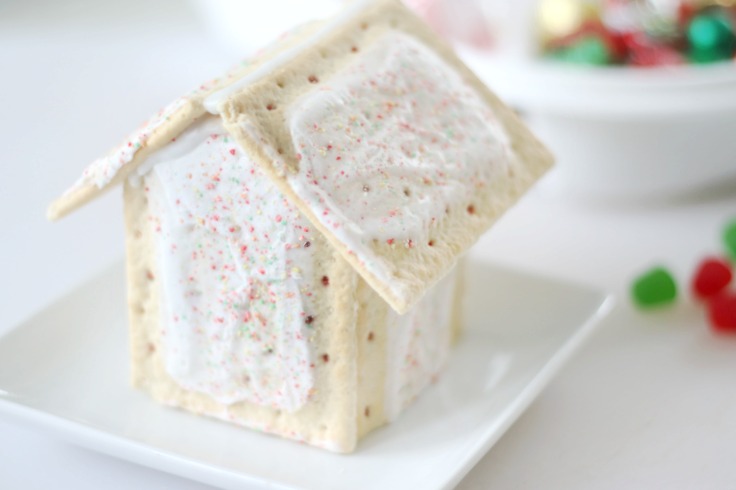
  • Repeat for the roof, holding it in place for a minute or so before letting go.

These houses are pretty sturdy once the royal icing has had a chance to set. This takes about 15-20 minutes. Not bad.

If you do this you shouldn’t have any issues with your house falling apart.

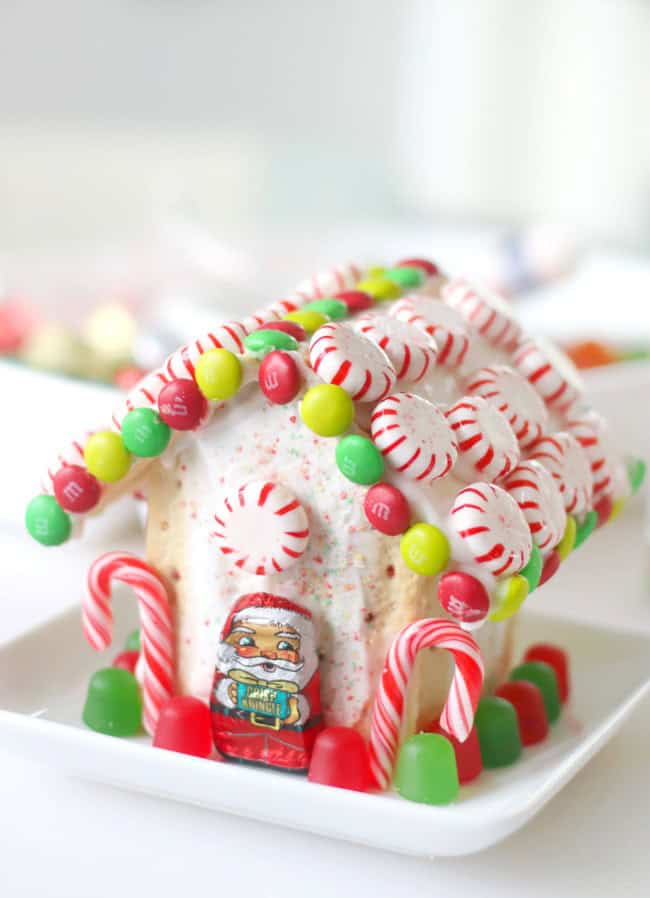
pop tart gingerbread house decorated with candy

TIPS FOR ICING AND DECORATING POP TART HOUSE

Make sure to watch our video to see how we assembled and decorated our house.

Obviously lightweight candies like Necco wafers are easier to work with than M&Ms and starlight mints, but don’t let that stop you. I’ll share a few tips for working with heavier candy. That being said, if you are making these with a group of children, I’d go for lightweight candy and sprinkles to avoid little ones getting frustrated. I’d also suggest assembling the houses about an hour before decorating them so that they are ready to go!

  • To add heavier candies to the trim (see M&Ms in photo):
    • Add a bead of royal icing to the house and let it sit for a couple of minutes before adding candy. This allows the icing to begin to get tacky. Add the candy, then adjust as necessary if you see any drooping. The icing will harden and hold everything after 10 minutes or so.
  • To add heavy candies to the roof, you have two options:
    • 1: Decorate the roof pieces before assembling the house and let them dry. Then assemble the house.
    • 2: Use the tip above for heavier candies, adding a bead of icing, let it sit for a minute or two, then adding the candy and adjusting as necessary until it is firm.
  • Decorating the walls:
    • If you’re only adding a couple of items (like I did) you can add them at the end. Easy.
    • If you’d like to add a bit of decoration to the walls of your house you can do that BEFORE assembling the house. Let it set up and dry then build your house. This is an easy way to make sure gravity doesn’t pull the candy down.

POP TART GINGERBREAD HOUSE TUTORIAL

pop tart house with candy and frosting

Pop Tart Gingerbread House

This pop tart gingerbread house is so fun to decorate and perfect for the holidays! Once you make a gingerbread house out of pop tarts you'll never go back to graham crackers again. I'll share tips and tricks for decorating your gingerbread house with candy and royal icing. 
4.84 from 6 votes
 Print  Pin  Rate
Prep Time: 20 minutes
Cook Time: 45 minutes
Total Time: 1 hour 5 minutes
 
Servings:  house
 
Calories: 1300kcal
Cost: $5

EQUIPMENT

  • serrated knife
  • plastic sandwich bag

INGREDIENTS

  • 6 pop tarts
  • 1/2 cup powdered sugar
  • 2-3 teaspoons water
  • INSTRUCTIONS

    • Place 6 pop tarts on the cutting board.

    Roof

    • You will be making cuts on 4 out of 6 of the pop tarts. The 2 that aren't cut are the roof pieces. You can set those 2 pop tarts to the side if you'd like.

    Front and Back Walls

    • Take 1 pop tart and place it on its side, right next to another pop tart.
    • Cut on a diagonal from the corner of the pop tart that it on its side, to the center of the middle pop tart. Repeat on the other side.
      pop tarts being cut with serrated knife
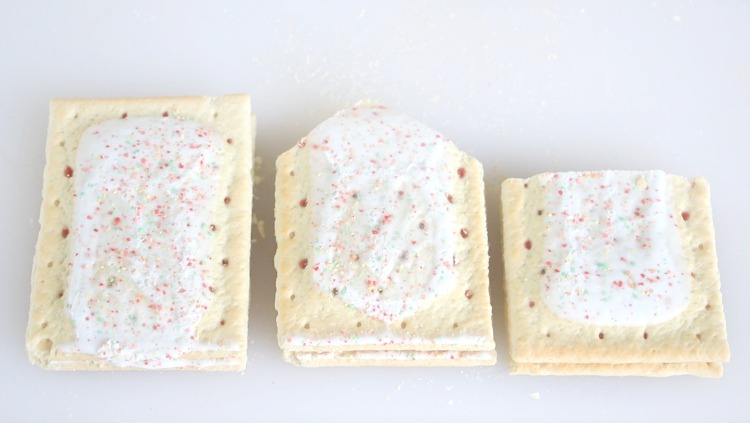
    • You should now have a pop tart that looks like a house. Repeat this step so that you have 2 house-shaped pop tarts.

    Side Walls

    • Remember that pop tart that you turned on its side? Go ahead and stand it up again. Place it next to one of the house-shaped pop tarts, lining up the corners, and cut horizontally across. Repeat.
    • You should now have two roof pieces (un-cut), 2 house-shaped pieces, and 2 wall pieces. 
      pop tarts cut into gingerbread house shapes
    • Combine powdered sugar and water to make a royal icing glue. Add water 1/2 teaspoon at a time until desired consistency is achieved (2 1/2 teaspoons works well for me). Spoon icing into a Ziploc bag and cut the tip off. Glue the 4 walls together with icing and hold in place for 30-45 seconds.
      pop tarts held together with royal icing
    • Add the roof pieces and hold in place for 30-45 seconds.
    • Let houses stand 15-20 minutes before decorating.
      pop tarts frosted together to look like a house
    • Dip decorations into icing or pipe icing onto houses to decorate.
      pop tart house with candy and frosting

    NOTES

    • Icing should be the consistency of craft glue.
    • When cutting pop tarts, use a serrated knife and gently saw. Don't press down hard with the knife.
    • To add heavier candies to the houses, like M&Ms, add a line of icing to the house and let the icing stand for a couple of minutes before placing the candy on it. This will allow the icing to dry a little and become tacky. 
    • You may need to hold the candy in place, or readjust the candy that starts to move as you wait for the icing to dry.

    NUTRITION